Back

May 14, 2013
How to create an effective promo video
There's a million ways to cook up a delicious startup video. But just like any meal, you need a good recipe. This 12-step guide will hopefully help you decide what your audience should feast (their eyes) on.
Before we begin, let's talk dollars. The beauty of being a startup is having the ability to do whatever you think is right. The beast of being a startup is that you don't have the money to do what's right. But we feel as you long as you spend your money the right way, have a good idea, and work really super-freaking hard, you can make something that looks like you paid more for it than you did. Good thing to note, people are very willing to help startups, which can turn a dime into 15 dollars.
Now, if you’re ambitious and want to show the world your product with a well thought-out, well-crafted video, here are a few steps to follow.
Watch our promo video for reference.
1. Start with a strategy
Awesome ideas are meaningless if they are, well, meaningless to your audience. So, first things first, know your audience. What’s the demographic? How is your product something they need? Where do they hang out online? Knowing simple things like this will help you understand the message you need to craft.
Now start crafting that message. Then simplify your message. Take everything you "need" to tell them with this video and distill it into one sentence. This can end up being your tagline, but more importantly it's your North Star for the final product. A common place to start is what is known as a creative brief, which is a set of questions you should be able to answer with your idea.
Ask yourself these questions and answer them as simply and succinctly as possible:
What’s the problem you’re trying to solve with your business/company/app?
Who’s your audience?
What’s your key insight?
What’s the general tone you want to have?
What’s happening in culture that you can tap into?
Check out our brief to see how we approached our strategy
2. Come up with a winning idea
This should be fun. Let your (real or metaphorical) hair down. Loosen the tie. Have a beer. Whatever you need to get out all those ideas. Here at Sold we like to call it "Throwing spaghetti on the wall." Toss away and see what sticks. Think of ideas that clearly, and simply, tell people how your product works. Don’t take yourself too seriously. Stay away from cliches. And be honest. It's your first impression. Put your best, well-dressed foot forward.
Once you have a couple ideas, set them aside and come up with some more. This could take hours, this could take days. This shouldn't take weeks. When you have 2 or 3 big ideas, go back to the brief. Does it answer all the questions?
We knew our audience was busy, and we needed to execute an idea that was both entertaining and informative. Our product provides a service for people that value time over money, which means they’re constantly buying and rarely selling. This led us to “The Sold Epiphany” – the idea that Sold fixes a problem they didn’t know they had.
3. Write the script
Once you have an idea everyone is set on, you can start putting pen to paper. Remember, you’re writing a story. So think of it as if you’re taking your user on a journey. You’re guiding them with words and visuals. Try acting it out with the team. This can help you bring life to the idea before you’ve written any words. Before you begin, keep in mind, everyone watching your video doesn’t understand your product half as well as you do.
- Set the stage. Where are we? Who’s on the screen? Are we hearing anything yet?
- Describe what we'll be seeing on the screen.
- Write the dialogue (if there is any).
- Describe what we'll be seeing on the screen.
- Write the voice over (if there is any).
- Describe what we'll be seeing on the screen.
- Leave the viewer wanting to find out more.
And now you're done! Wrong. Rewrite it. Then edit, edit, edit. Then edit some more. It may sound like a pain in the ol' backside, but it's very important to refine your message. Cut out the fluff. Keep it simple. Now that you've cut down your script, act it out again. It should be no longer than 90 seconds long. That’s our rule at least. Keeps things concise.
This is where our script started, and you can see that even after refining it to “its final form”, we continued to edit it down throughout the whole process.
4. Find your talent
The right talent depends on the character you created in your script. How do they look? What kind of tone you want them to have? Good looks are good and all, but the most important thing is the ability for someone to own the character. Find someone who can act. Seriously. You don't want people struggling to watch your video because someone is awkward on camera. It's harsh, but it's your video. Treat it right.
We were fortunate to have a handsome lil’ devil of a friend to be the main character and an improv friend to be our voice is the sky.
If you don’t have any actor friends, or you don’t live in L.A., try looking into a casting agency, or even putting an ad out on Craigslist. Check out a local improv troupe. Better yet, use Facebook’s new Graph Search to find “friends of friends that are actors”.
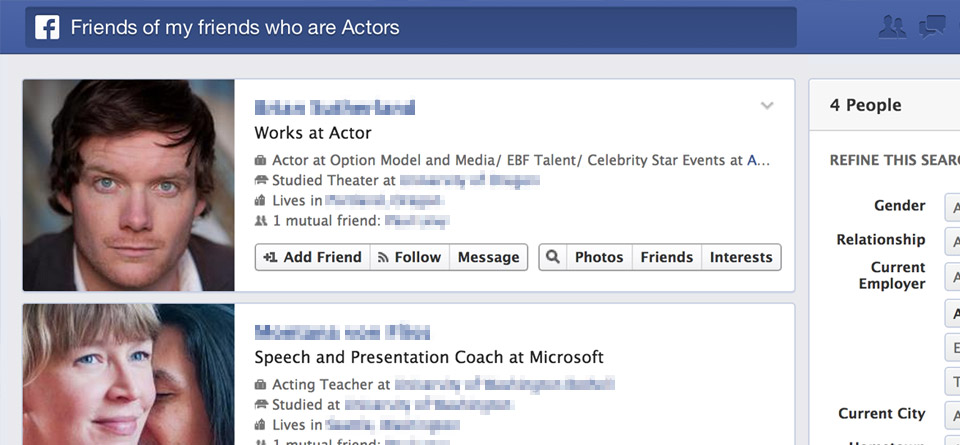
Facebook is a great tool to find talent. You probably have friends who can act.
5. Find a location
Once you have the script, you need to find the right location. You know what it looks like in your head and what it sounds like in your script. But think critically about how your audience will perceive it. Err on the side of aspirational.
Finding the perfect location can be hard, but just ask around. Someone probably knows someone who will let you borrow their house for the day. Just buy them a dinner and have Exec send a cleaning crew by the next day.
If that doesn’t work try Airbnb. If you live in Toronto, here’s an awesome listing for a pool scene. If you have a pool scene. Otherwise check out locations in your area. Be sure to inform the host of your intent up front. There can be some hefty fines involved with not being honest.
We went with our friend's fancy spot in Brooklyn.
6. Create a shooting board/storyboard
You’ve got your script, you have a location, and now it’s time to shoot. Before getting started, an important step is to storyboard every shot in the context of your chosen location. By understanding the scene and location, you will know (roughly within range) how many shots you’ll need. These don’t need to be gallery art worthy, just rough estimations of the scene, and composition - how it will look in camera. You can also use this as a checklist on shoot day.
Take a look at our shooting boards, and then use this template to make your own.

Quick sketches work just fine. More Basquiat and less Picasso.
7. Get the proper equipment
You could film it on an iPhone 5 if you wanted. It would probably turn out better than you think. But it's worth it to pay a few extra dollars to get a nice camera and some lights. You can rent a Canon 5D Mark II (we used a Sony FS-100), a lighting kit, and a microphone (if there is dialogue) for the weekend at a very reasonable price. We’ve used Calumet Photo in the past and were very happy with them.
Lighting is very important. Unless you’re experienced, stick with a simple 3 point lighting setup and spend some quality time making sure you understand the conditions of good lighting. In short, you’re looking to capture ‘even lighting’ where the darks aren’t too dark and brights aren’t too bright. The more dynamic range you capture, the more you’ll have to work with in post production. Check out this great tutorial on Lighting 101.
If you know someone who's filmed things before, hire them for the day. If you want to do it yourself, do your research. Knowing how the camera works prior to the day of the shoot will save the day. Our friend, Mike Prevette, was kind enough to spend the day being our Director of Photography.
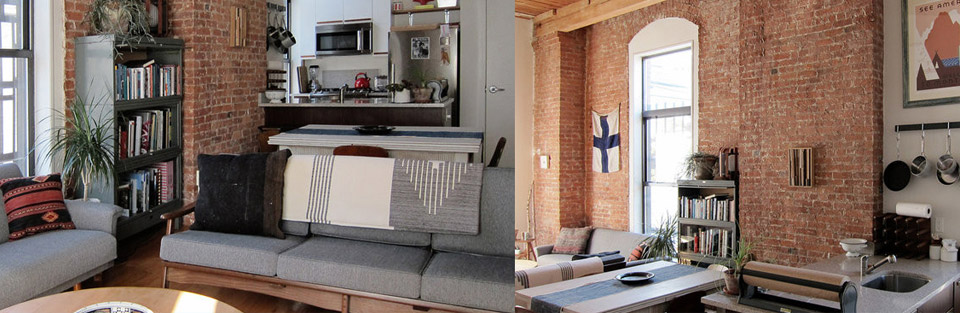
8. Do some set decoration
This is important. If you're in an apartment, take out the clutter. The stuff on the walls, shelves, etc. should just be there to help with the vibe and not draw attention away from the subject. In general, keep it simple. Clutter in a room looks even worse on camera. Plus, it’ll save you money.
Keeping decor subtle helps maintain focus on the subject.
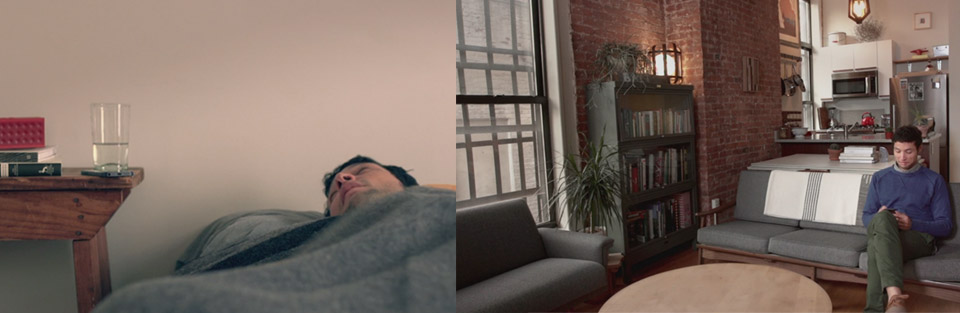
9. Film
You have your location, talent, storyboard, camera and lights, now what do you do? Well, if you haven’t already, decide who’s going to run the camera, who's going to direct the talent, and who's going to get the coffee. It’s important that everyone on set has a role. It’s a high stress environment and understanding what your role is will help things move smoothly.
Before you start filming, something that will help with knowing “how to film” is simply understanding how you want the end result to look and feel. Find movie references with the vibe you’re going for. Watch how the actors move through a scene. Watch how the camera acts. Is it staying still (“locked off” in industry terms)? Is it roaming around, adding some movement? These choices will make drastic differences in the aesthetic quality of your video.
Now get to filming. While your “camera operator” is setting up the lights, take a moment to sit with the talent. Explain to them your vision for the video (this can definitely be done prior to the shoot day, but helpful to do day of). When they’re ready, get them in position. Run some test shots to give them some time to get into character. Test shots should also be used to make sure the lighting levels are right (see step 7 for lighting tutorial), the composition is set (is everything that should be on camera, on camera?), and test the microphone. Seriously, make sure you’re capturing audio levels properly, it can be a huge headache afterwards. With any standard microphone and camera setup you’ll be able to read the audio levels on screen. Just make sure at any point they aren’t peaking from regular dialog (turning from green to red).
Time to make some magic. Get everyone quiet on set. And…ACTION.
Once you think you’ve got the first scene done, it helps to do a few extra takes to get in the flow of things. Then you can move on. Go through all your shots on your storyboard, but don't be afraid to get additional shots. Look for opportunities to film things that weren't in the script. Maybe the way you thought one scene should be, should actually be completely different. The more you have your head on a swivel the better. That way, when you start editing there's more than enough to work with.
Just make sure to plan how long you’re going to need to film. We had planned for a 2-day shoot, but ended up getting lucky and doing ours in a single (LONG) day.
10. Edit
Now you’ll need to take all the footage on the camera and transfer it to an external hard drive for safekeeping (we suggest the Lacie Rugged 1TB Drive). Get all the files together and transfer them to iMovie, Final Cut Pro, or Adobe Premiere (we use Final Cut Pro). Learning these tools can seem daunting, but an afternoon of watching some video tutorials on YouTube or Vimeo will help get you up to speed (Lynda.com is a great starting resource). Another useful tip is to watch movies, commercials, etc. that you like to get a sense of how they pace the scene. Watch The Office and you’ll notice how they manufacture awkwardness by lingering on characters a bit too long. Watch Snatch and get a sense of how you can use a bunch of quick shots to tell a long story.
You have the storyboards, so that's the best place to start. Pick the best take of each scene and start stitching them together. Keep these few things in mind as you edit:
- Does the story make sense from beginning to end?
- Maintain continuity. Is the time of day changing between scenes? Is wardrobe consistent?
- Cut things out. Even if it hurts, and the scene is beautiful, if it’s not essential, cut it.
- Try unexpected things, you’ll surprise yourself with what you can make work.
With your rough edit together, take a step back. Go to lunch. Come back and take a fresh look to see if it makes sense. When you start liking it, get other people to look at it. Show it to your Mom. Most importantly, show it to someone who approximates your audience. Watch for their reactions. Does the idea come through? Do they walk away with the right message?
Get everyone's opinion. Everyone will view it slightly different. Of course you have to filter the feedback, but chances are you're a smart cookie.
11. Sound design
This can be one of those things that elevates your video into the land of "how much did you pay for this?" It's a tough thing to do, but with some blood, sweat, and beers, you can do it. On shoot day you tested the levels on the mic, right? So, you should have some decent audio to work with.
To create your audio track that you’ll eventually pull back into your edit, there’s some great tools out there. We use Adobe Audition, which has a number of features to make "ok" audio become "good" audio.
Some things to keep in mind: Aside from the obvious needs of lips being in sync, sound design is about subtlety. If you’re in an apartment in Brooklyn, you might hear the gentle buzz of street sounds in the background. If your actor is reading a magazine, the pages should make a slight ruffle as they flip. When you start paying attention to it, you’ll notice the prominence of sound design in just about everything you watch. The best tip there is to make it feel real. How does a plate actually sound when it hits the ground? Drop a plate and find out.
And if you want, get yourself a song. Write one. Get a friend to write one. Use Garageband. Buy one for $99 on Vimeo. Whatever you choose, make sure it fits the vibe of your video. It shouldn't be the focus. And it shouldn't be completely lost in the background. It should be complimentary.
12. Color
The final step. Hooray! This will give you that extra polish that makes it feel professional.
Coloring is just all about making sure everything is balanced. Are the blacks black? Are the whites white? Are the midtones coming through? You can make your entire spot look like a hollywood blockbuster (ill advised) by color grading it teal and orange. It’s a thing you’ve seen before.
There are many tools with which you can color your spot. We’ve used many, but prefer the workflow of Magic Bullet Colorista which is compatible with After Effects, Premier Pro, and Final Cut. Other options are Adobe’s SpeedGrade, Resolve, and Apple Color.
If you’re unsure, just don’t go too far. Hold back the desire to make your video look like a Michael Bay movie.

Coloring helps keep continuity between scenes, and is a great way to set an overall mood
That's it!
Well, valued blog readers, this is our comprehensive list of the things we follow every time we're making a video. If you would like to know more, please feel free to contact us, or follow us @usesold.
NOTE: We do not take any responsibility for people taking our words and making bad startup videos. But if you make a good one, you're welcome. Wink.